
01What it is for
VictronConnect is used to configure, monitor, update firmware and diagnose compatible Victron products. In practice it is the main tool when commissioning an installation: you set the battery type and charge voltages, check current readings and history, upload new firmware and save settings to a file.
For VE.Bus devices (MultiPlus, Quattro, EasySolar), VictronConnect replaces the older VEConfigure and VEFlash programmes — but not yet completely. Assistants, Virtual Switch and grid codes are still set in VEConfigure (details below, in the section on MultiPlus and Quattro).
02What it runs on
| System | Requirements | Notes |
|---|---|---|
| Windows | Windows 10 or later | Bluetooth from VictronConnect v6.40. Windows 10 has a built-in driver for VE.Direct-USB and MK3-USB cables. |
| macOS | macOS 13 (Ventura) – 26 (Tahoe) | Intel or Apple Silicon; Bluetooth requires Bluetooth 4.0 (BLE). |
| Android | Android 9.0 or later | Connection by cable via a USB OTG adapter. From Android 12 the app does not require location access. |
| iOS / iPadOS | iOS 16 or later | iPhone and iPad do not support USB OTG — Bluetooth only, no cable connections. |
| Linux | AppImage | Provided without official support. When using USB cables, the user must belong to the dialout group. |
You can download the app from Google Play, the App Store or the Victron downloads page (Windows, macOS, Linux). For older systems, Victron keeps archived versions, but without support (for example, the last one for Windows 7 and 8 is 5.106).
03How to connect
The connection method depends on the device. In the device list, on the Local tab, you will see Bluetooth devices within range, devices connected by USB cable and GX devices on the same LAN. The VRM tab shows installations from your VRM account.
| Device | Connection | From an iPhone |
|---|---|---|
| With built-in Bluetooth (SmartSolar, BMV-712, SmartShunt, Blue Smart, Orion Smart, Smart batteries, RS line) | directly via Bluetooth | yes |
| With a VE.Direct port without Bluetooth (BlueSolar MPPT, BMV-700/702, VE.Direct inverters) | VE.Direct Bluetooth Smart dongle or VE.Direct-USB cable | only via dongle |
| MultiPlus, Quattro, EasySolar (VE.Bus) — full support | MK3-USB cable and factory straight RJ45 cable | no |
| MultiPlus, Quattro — monitoring and control | VE.Bus Smart dongle (Bluetooth) | yes |
| VE.Can devices (e.g. MPPT VE.Can, Lynx Smart BMS) | only through a GX device — locally on the network or via VRM | yes |
With MK3-USB, the VE.Bus device must be powered (MultiPlus and Quattro from AC mains or battery, inverters from battery). Manually crimped RJ45 cables often cause problems — use the factory cable. VictronConnect does not work with the older MK2-USB interface. As long as the MK3 cable is connected, communication of the VE.Bus device with the GX is blocked, so the GX may report alarms.
04PIN, PUK and Bluetooth
- First connection: enter the PIN from the device sticker. If the sticker does not show a PIN, the default is 000000. Change it in Product info → Change PIN code (avoid 111111 and 123456).
- Forgotten PIN: in the device list, the “three dots” menu → Reset PIN code and the PUK code from the label. On Blue Smart IP22/IP43/IP65 you can also reset with the MODE button (10 s, until the blue LEDs flash twice), and on the VE.Direct Bluetooth Smart dongle with the “Clear PIN” button (5 s). Resetting restores PIN 000000, not the factory PIN from the sticker — set a new one straight away.
- After changing the PIN, other paired phones must remove the old pairing and pair again.
- The device remembers the last 10 phones, and only one can be connected at a time.
- Bluetooth disabled (Product info → Bluetooth enabled) can be reversed in most devices — for example with a VE.Direct-USB cable or the MODE button. In Lithium Smart batteries, Orion Smart DC-DC and when permanently disabled in Blue Smart IP67, it is irreversible.
05Working with the device
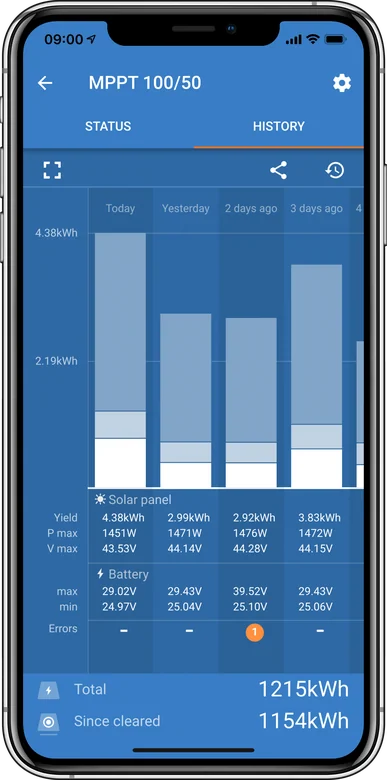
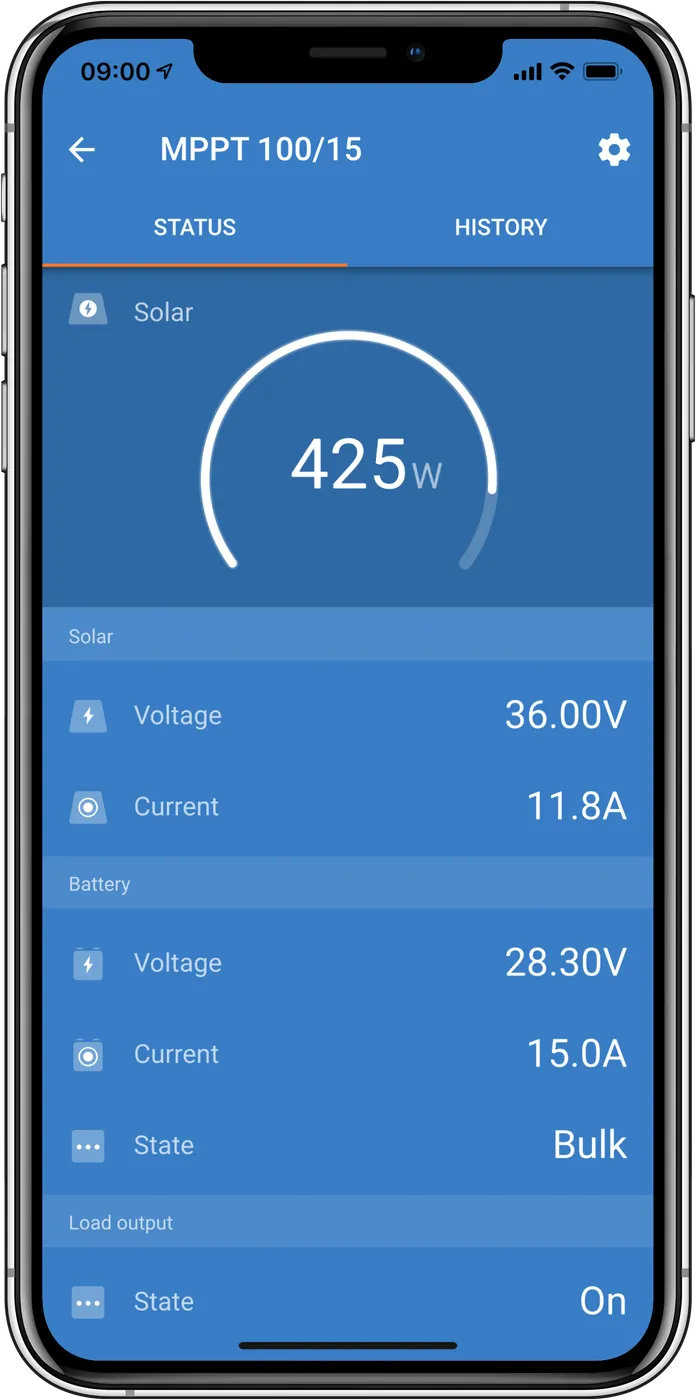
After connecting, you see the live data screen. Typical tabs are Status, History and Trends, and settings open with the cog icon in the top right corner. Product info (the “three dots” menu in settings) contains the device name, PIN, firmware version, Bluetooth switch and Instant readout.
- Instant readout — you can see the most important data in the device list without connecting, with a greater range than a normal connection. The data is encrypted. The function is disabled by default — you enable it in Product info.
- Stored trends — the device records data every 30 minutes and stores about 46 days (Smart Battery Sense about 181 days). Readout is Bluetooth only. Supported by SmartSolar, BMV-712, SmartShunt and Smart Battery Sense, among others.
- Alarms and errors appear on the data screen when the app is open, and in the device list only when Instant readout is enabled. Meaning of the codes: error codes.
06Settings files, demo and lock
- Save and load settings: in the device settings, the “three dots” menu → Save settings to file, Import settings from file or Share settings. After import, changed items are marked with an orange circle, and the device changes nothing until you press Apply. You can load the file into another unit of the same model.
- Settings files manager in the main menu opens the saved file as “DEMO PRODUCT” — but only a file created by the same app version. Import an older file from the settings of the connected device.
- Demo library — demonstration settings for all supported products. Useful for learning and for preparing a configuration before you arrive on site. You can save a MultiPlus configuration prepared in demo and upload it to a real device.
- Settings Lock — the installer can lock critical settings with a password (min. 8 digits). The user can still view data, control the device and update the firmware. Supported by the BMV-712, SmartShunt, SmartSolar MPPT, Multi RS and MPPT RS (usually after a firmware update).
- Batch programming — uploading firmware and a settings file to many devices at once: with VE.Direct-USB cables via a powered hub, or over Bluetooth by scanning QR codes (Android and iOS only, with internet access).
07VE.Smart Networking
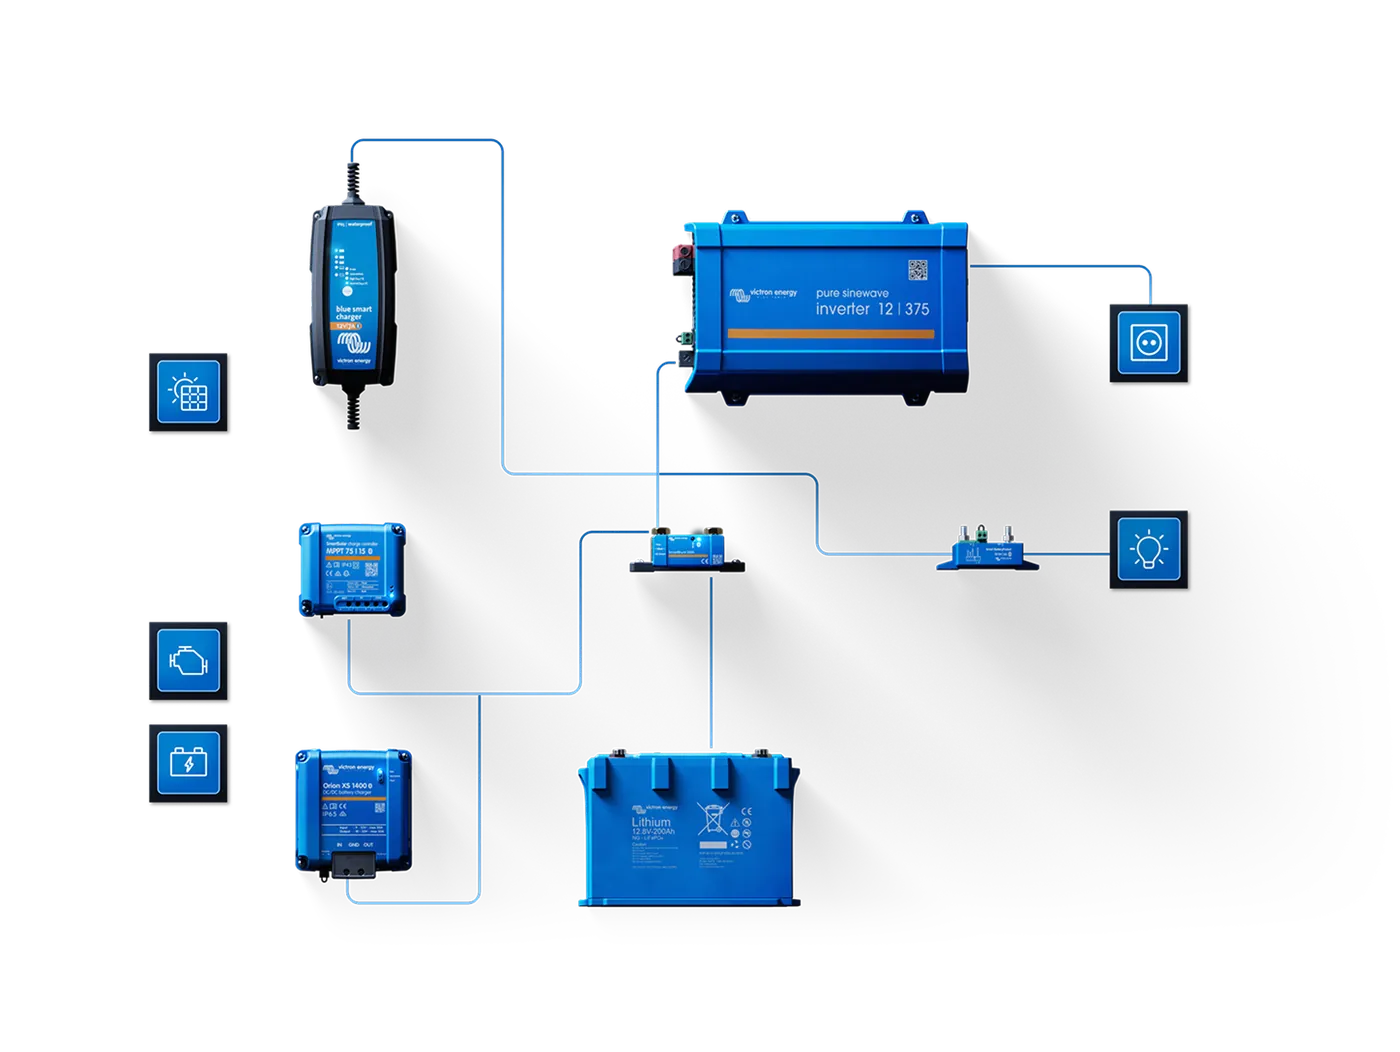
VE.Smart Networking is a wireless network between Victron devices: a sensor (BMV, SmartShunt or Smart Battery Sense) sends battery voltage (Vsense), temperature (Tsense) and current (Isense) to chargers, and the chargers can charge synchronously.
- Up to 10 devices in a network and one sensor. The network is intended for small systems without a GX device controlling charging — with a GX and DVCC, charging is controlled by the GX (DVCC).
- Setup: first the sensor — Settings → VE.Smart Networking → Create Network, name it, Save; then each charger — Join Existing. Operation is confirmed by the network icon and the LED flashing every 4 s.
- Older SmartSolar units (e.g. 150/85 and 150/100 with part numbers SCC010085210, SCC010100210) do not support VE.Smart — this is a hardware limitation.
08MultiPlus and Quattro in VictronConnect
Full support for VE.Bus devices — reading, changing settings and firmware updates — requires firmware 415 or later. It is available only for the newer microcontroller: the 7-digit firmware number on the label starts with 26 or 27. Devices with a number starting 19 or 20 can only be read by VictronConnect, and those starting 18 are not supported. Mixed systems (old and new microcontroller in one system) are not supported — use VEConfigure for these.
| Action | VictronConnect | Elsewhere |
|---|---|---|
| View, on / off / charger only, input current limit | yes — MK3-USB or VE.Bus Smart dongle | GX, Digital Multi Control panel |
| General, inverter and charger settings | yes — MK3-USB only, password-protected Settings mode | VEConfigure |
| Firmware update | yes — MK3-USB only; restores factory settings | remotely via VRM |
| Parallel or 3-phase system | creates systems with up to 3 devices, configures existing ones up to 12–15 | VE.Bus System Configurator |
| Assistants (e.g. ESS), Virtual Switch, grid code, external current sensor for MultiPlus-II | no | VEConfigure, assistants |
VE.Bus configuration is intended for trained installers — Settings mode is protected by the password given during Victron training or by the distributor. With a device controlled by a DMC panel or by VE.Bus BMS, switching mode and the current limit from the app do not work unless there is a GX device in the system.
09VictronConnect-Remote (VC-R)
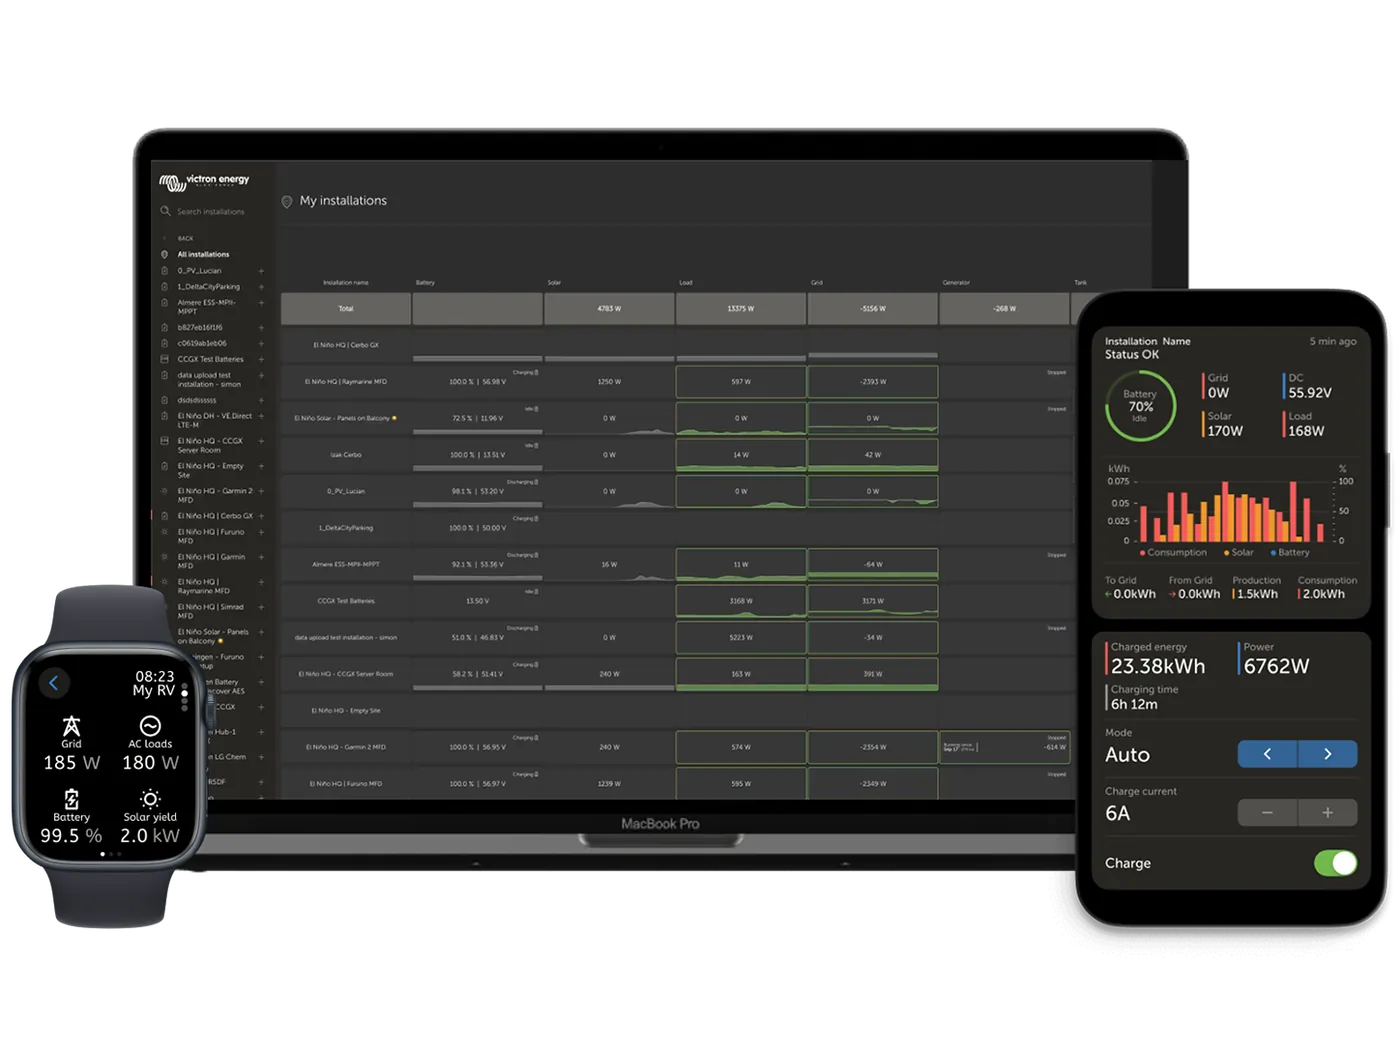
VictronConnect-Remote opens devices from your installation remotely, via the GX device and the VRM portal — with the same appearance and settings as when connected locally.
- Requirements: VictronConnect v5.20 or later, a GX device with Venus OS v2.40 (v2.53 recommended) and internet access, and in the GX the VRM access setting set to Full (in older versions: “Two way communication”).
- How to open: VRM tab → Sign in to VRM (log in in the browser) → installation → device. The settings icon appears only after all settings have loaded.
- Scope: VE.Direct and VE.Can devices — full configuration. MultiPlus and Quattro — view only; their settings are changed remotely via Remote VEConfigure. Not supported: BlueSolar MPPT VE.Can 150/70 and 150/85, and the Lynx Ion family.
- VC-R loads the GX processor — in large systems, a Cerbo GX is better than the older CCGX. The firewall must allow the victronenergy.com domain.
10Troubleshooting
- Device not visible: connect from within VictronConnect, not from the phone’s Bluetooth settings; check that the device is not connected to another phone (only one connection at a time).
- Pairing error on iPhone or Android (codes B2, B3, B4): remove the device from the paired list in the phone’s Bluetooth settings and connect again.
- MultiPlus does not respond via MK3-USB (V22): check the device power supply and the cable. Test with a GX: disconnect the MultiPlus from the GX VE.Bus port, connect the MK3-USB to the GX USB port (Venus OS v2.23+) — the MultiPlus should appear on the GX.
- Firmware update fails — rules and error codes: software update.
Devices this applies to
 VE.Direct–USB interfaceCable from the VE.Direct port to USB — settings and updates from a computer, and a way to connect more devices to GX than there are VE.Direct ports.
 VE.Direct Bluetooth dongleBluetooth dongle for the VE.Direct port — gives view and settings on your phone for devices without built-in Bluetooth.
 MK3-USB interfaceCable between the VE.Bus port and a computer — without it you cannot change settings or update the MultiPlus.
 VE.Bus Smart dongleBluetooth for a VE.Bus inverter/charger — view, switch on and set the campsite current limit on your phone, plus a battery sensor.
Related
- VEConfigure — full configuration of MultiPlus and Quattro.
- Software update — all device families.
- Monitoring in VRM — portal, alarms, remote access.
Sources
- VictronConnect Manual — chapters 1–17 (platforms, connection, PIN, settings files, VC-R, products)victronenergy.com · EN
- VictronConnect configuration guide for VE.Bus products (rev 04)victronenergy.com · EN
- VE.Smart Networking — limitations and step-by-step setupvictronenergy.com · EN
- Victron software downloadvictronenergy.com