
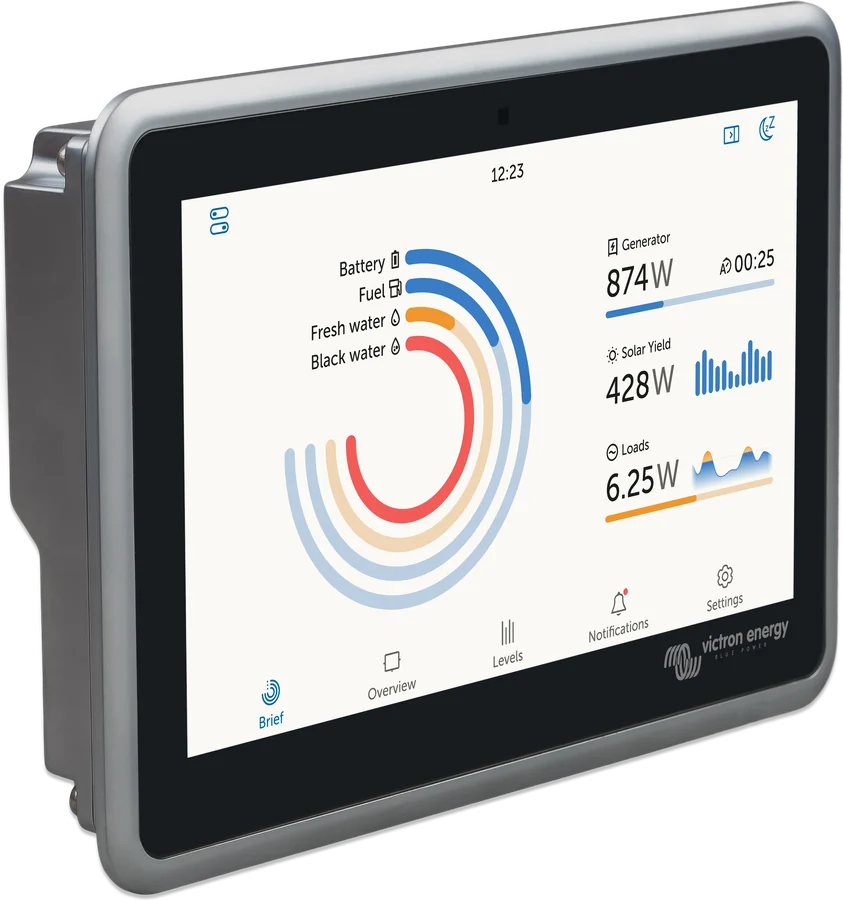
01How to open Remote Console
| Method | How to |
|---|---|
| GX Wi-Fi access point (on site, without a router) | connect to the Venus-[serial number] network — the key is on the side of the box and on the card in the bag (on Cerbo GX also as a QR code). Then VictronConnect → GX → Remote Console or a browser: http://172.24.24.1 or http://venus.local |
| Local network (LAN or Wi-Fi) | browser: venus.local — computer or phone on the same network as the GX. You can also find the GX IP address in VRM (Device list); on Windows, the GX is visible in the network (UPnP) and a double-click opens Remote Console |
| VRM portal (remote) | GX with internet access (Ethernet cable with DHCP recommended), log in at vrm.victronenergy.com and in the menu on the left Remote Console. Requires working VRM data logging and VRM access set to Full or Read-only |
| VictronConnect via Bluetooth | initial setup and network settings only — Remote Console does not work over Bluetooth |
GX Bluetooth PIN: on devices with a serial number before HQ2242, the default is 000000 (you must change it when you connect for the first time); from HQ2242, a random 6-digit PIN is on the sticker on the back. You can read the production date from the number in the serial number decoder.
VRM connection test: open https://ccgxlogging.victronenergy.com/ from the installation network — a 403 or 405 response means the connection works.
02New interface (from Venus OS v3.50)
Venus OS v3.50 (October 2024) introduced a new interface — faster, with light and dark mode and a vertical phone layout — plus HTTPS for Remote Console on the local network, one network security profile and simplified VRM settings. You can switch between the new and classic appearance in Settings → General → Display & Appearance → User interface.
- Brief — rings: sources (grid, PV, alternator), energy storage and consumption.
- Overview — sources on the left, battery and processing in the middle, loads on the right.
- Levels — tanks and temperatures; Notifications — alarms and warnings; Boat — page for electric boats (v3.60, landscape only).
- Controls pane (top left) — inverter/charger mode, input current limit, generator, ESS, EV charger; Switch pane — relays and switches.
03Settings menu
From Venus OS v3.60, the Settings menu has six categories and a navigation path at the top:
| Category | What it contains |
|---|---|
| Devices | all connected devices and their settings |
| General | Firmware, Access & Security, Display & Appearance, alarms, language, date and time, restart, Support status |
| Connectivity | Ethernet, Wi-Fi, Bluetooth, VE.Can, cellular network |
| VRM | VRM portal and access level |
| Integrations | relays, sensors, tanks, PV inverters, Modbus TCP (port 502) and MQTT — both disabled by default |
| System Setup | AC and DC system, DVCC, ESS, battery selection |
04MultiPlus and Quattro on GX
- Input current limit — works on inputs with “Overruled by remote” enabled in VEConfigure. In parallel and 3-phase systems, the entered value is the total limit per phase. With PowerAssist enabled, a model-dependent minimum applies.
- Operating mode On / Off / Charger only — inactive when the system has a Digital Multi Control panel or VE.Bus BMS. If DMC or BMS has ever been connected, run Redetect VE.Bus system.
- Advanced: Redetect VE.Bus system (clears GX memory without switching the inverter off), Restart VE.Bus system (like switching off and on with the switch — clears persistent errors), equalisation, ESS relay test and, from v3.60, Backup & Restore of VE.Bus settings.
- GX supports VE.Bus firmware from 111; 18xxxxx microprocessors are not supported. You can connect one VE.Bus system to the GX VE.Bus ports — a second system via MK3-USB will be visible, but without DVCC, ESS and generator control.
- Full remote configuration of MultiPlus: Remote VEConfigure; remote VE.Direct and VE.Can devices: VictronConnect-Remote.
05Access, passwords and security profile
- Access level (Settings → General → Access & Security): “User” protects against accidental changes, “User & Installer” gives more permissions — the distributor has the password for it.
- Local network security profile (from v3.50) applies only to access through the local network:
- Secured — Remote Console only via HTTPS, with a password; default on new devices, and the default password is the 6-digit Bluetooth PIN from the enclosure,
- Weak — HTTP and HTTPS, with a password,
- Unsecured — no password; required for integration with Garmin displays (and recommended for other navigation displays).
- The changed password must be at least 8 characters. With HTTPS, the browser will show a certificate warning — you need to accept it; a logged-in session lasts 365 days.
- VRM access (Settings → VRM → VRM Portal): Full (default — data, control, Remote Console, VictronConnect-Remote, remote updates), Read-only (view only) or Off. In VRM Remote Console, users with the Admin or Technician role open it without a password; the User role does not have access to it.
- Lost password: hold the GX button for at least 4 s (release when the access point LED flashes green rapidly), then power off and on again. The network returns to DHCP, the Wi-Fi access point is enabled, Remote Console works on the local network and through VRM, and the Bluetooth PIN is reset.
06Updates and Venus OS Large
- Settings → General → Firmware → Online updates → Check for updates; without internet — a
.swufile in the root folder of the microSD card or USB stick and Install firmware from SD/USB. Details: GX update. - Update feed: official releases or beta. Auto update: off, check only or check and install — Victron recommends not installing automatically and updating during planned servicing, with someone on site.
- Stored backup firmware — return to the previous version without internet or media (GX has two system partitions).
- Image type: Large adds Node-RED and Signal K. Large-version features are not officially supported by Victron. GX raises an alarm when less than 10% space remains on the data partition.
07SSH access (for advanced users)
- Set the Superuser access level: in Access & Security, with the “User & Installer” level selected, drag the list down and hold for about 5 s.
- Set root password — at least 6 characters; the password disappears after a firmware update.
- Enable SSH on LAN and connect:
ssh root@[IP address], port 22.
It is better to use SSH keys (~/.ssh/authorized_keys on the /data partition survives updates). Changes to system files disappear with every update, and careless changes can disable the device. From v3.60, the Support status page shows whether the system has been modified and lets you disable modifications.
08Factory reset
From Venus OS v2.12: the file venus-data-90-reset-all.tgz (without renaming) on a blank FAT32 USB stick or card, start the GX with the media inserted, remove the media after full startup and restart. This clears, among other things, Wi-Fi data; a VRM token reset may be needed. The installation ID in VRM and data history remain.
Devices this applies to
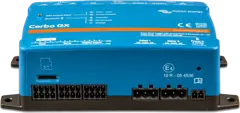 Cerbo GXSystem control centre and gateway to the VRM portal.
 Ekrano GXGX centre with built-in 7″ touchscreen.
 GX Touch 50/70Optional 5- or 7-inch display for Cerbo GX: system overview, settings, surface or flush mounting.
 MultiPlus-II GXMultiPlus-II with built-in GX device, display and Wi-Fi — VRM without a separate Cerbo.
Related
- VRM monitoring — portal, alarms, sharing.
- Node-RED on Cerbo GX — automation in Venus OS Large.
- Cerbo GX and Ekrano GX — device cards.
Sources
- Cerbo GX manual — chapters 4 (interface, security profile), 8 (access), 9 (menu), 10 (firmware), 11 (VE.Bus), 13 (VRM), 19 (reset)victronenergy.com · EN
- Venus OS: Root Accessvictronenergy.com · EN
- Venus OS v3.50 — new interface and security (30 October 2024)victronenergy.com · EN
- Venus OS v3.60 (10 June 2025)victronenergy.com · EN